By now, enough time had passed that Prissy’s OmniMeter was actually ready, meaning she could run either side of the inspection. She might need some help in the garage, as there were certain devices that could only be reached via Snips (an affectionate name for our robotic scissor lift).
Oh, no. Neither of you are getting on a lift until you complete your training.
This day was full of surprises. In addition to performing a practice inspection, both of us would be completing a basic lift training course, to be jointly administered by Ashton and Amendoa. Not only would we be going up on Snips to hit the heat detectors, but we’d also have to pick the highest acorn on the oak tree using Boomer. Prissy was about ready to go home.
I'll go up with her.
We agreed to commence the inspection, and save lift training for last. I had Prissy open up the OmniMaps application and open the inspection file for Amco at 2120 Prospect Boulevard. The first question that pops up is whether the FACP is normal prior to beginning the inspection. She answered yes, and loaded the minimap.

We removed the red dress panel from the front, revealing the internal circuitry and terminal connections. Before we did any of the fun stuff, we had to check that the batteries were manufactured less than five years ago and still in good condition. Prissy unpacked the brand new set of miniature alligator clips from the plastic baggie, and plugged it into the OmniMeter.
She thumbed through the menu, and navigated to the battery tab as directed. There was one set of batteries listed, which she clicked on to proceed to the pre-check questions. The set consisted of two 12-volt, 12 ampere-hour batteries, manufactured in March of last year and connected in series to make 24 volts.
Now that these were answered, she could proceed to the load test, which would place an electrical load on the batteries to verify that they would be able to hold a charge for 24 hours during a power failure. She connected the clamps to the entire battery assembly, and was about to press “START”.
I removed the jumper connecting the two, placed the clamps on the left battery, and pressed the start button. After about twenty seconds, the results were in, and the battery passed the load test at 100%. We repeated the process for the right battery, and it passed at 90%. This data was automatically posted to the OmniMap file.
We still had to disable the notification appliances so we didn’t have to hear them each time we tested something. The positive terminal for NAC 1 was blackened with permanent marker, indicating that the previous technicians disabled the signals by disconnecting that wire. The other notification circuit, NAC 2, was being used for the city box interface card (model AG-5220) and should remain connected.
I wanted to show Prissy the more “sophisticated” way of disabling signals. Using the front display, I had her type in the default user code. This didn’t work, so we double-checked the report. Ashton had changed it to 2120, the company’s street address. We logged in successfully and disabled NAC 1. The trouble piezo sounded, and Prissy acknowledged the panel. Trouble, NAC 1 – success!
She selected the first device she was going to test, which was the AG-PHOTO addressable smoke detector above the FACP. I warned her that these detectors could be a bit finnicky. Sometimes, the LEDs will flutter for a second like they’re about to go into alarm, only to go back to normal. But ANN-80 Oakley over here was able to turn it red in three shots.
Pass! Next case.
The address was D001, and the description was “VESTIBULE ABOVE FACP”. On the report, the address was listed as M001 (indicating a pull station or module) because the motto of the previous team was to leave no inspection un-bungled. I showed Prissy how to edit a device’s description and move icons around on the minimap.
How reports were prepared varied from company to company, but Ashton and Amendoa both agreed that the description in the report should correspond to the device’s physical location. If a customer insisted that the FACP description be used, then we’d add a footnote indicating this. In either case, a panel description not matching the device’s physical location would be a deficiency, while a vague description would result in a recommendation.
There were two addressable pull stations, and one of them was in the waiting area by the vestibule. She pulled it, causing the LED to switch from blinking green to steady red. That was the real M001.
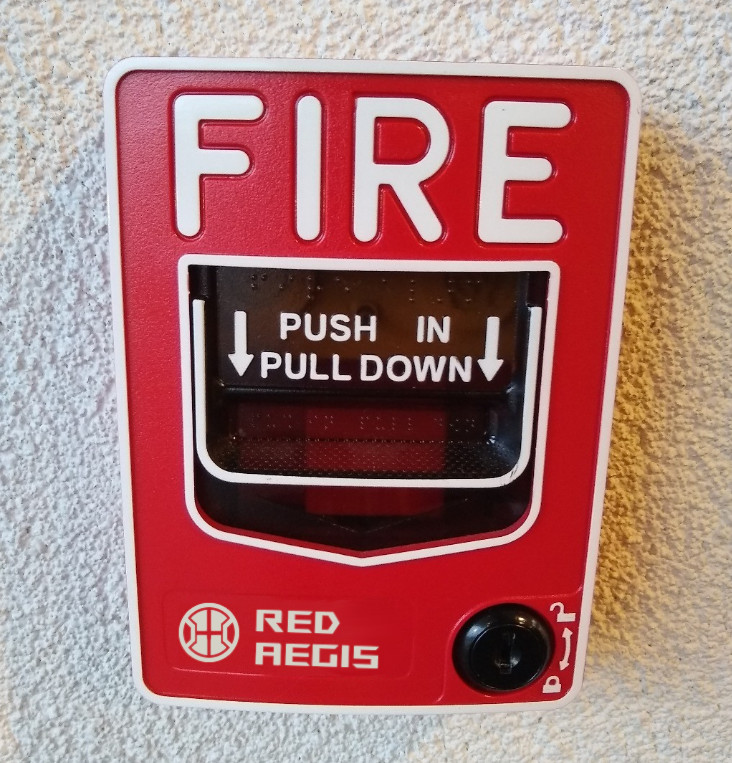
Same shell as the Fire-Brite GG-12.
Prissy tested the next three addressable smoke detectors in the office area, as well as the pull station by the rear exit. I stepped away from the FACP and headed to the kitchenette to make sure she knew how to properly use the Heat Ray.
Her aim was good, but she had it set to “kill”, rather than “stun” (okay, 200°F instead of 135°F). Though this would activate the detector a tiny bit more quickly, it would also drain the Heat Ray’s battery at noticeably higher rate. Fortunately, there were only three more devices left to test in this manner, and the Heat Ray was good for about 50-100 “shots”.
That wasn’t the problem. Prissy was thinking of these:
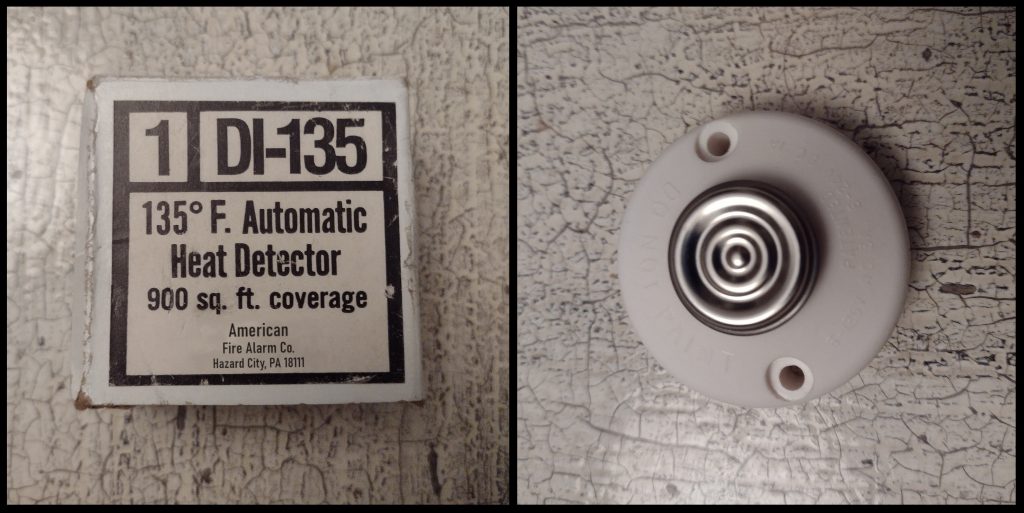
They feature heavily in the fire alarm lab at Punxsutawney.
These restorable, bimetallic strip-type heat detectors were manufactured by several companies, and looked nearly identical to the far more common “button” heat detector. The latter had a metal disc (which was a form of fusible link) that would break apart when exposed to high temperatures, releasing a spring-loaded button switch.
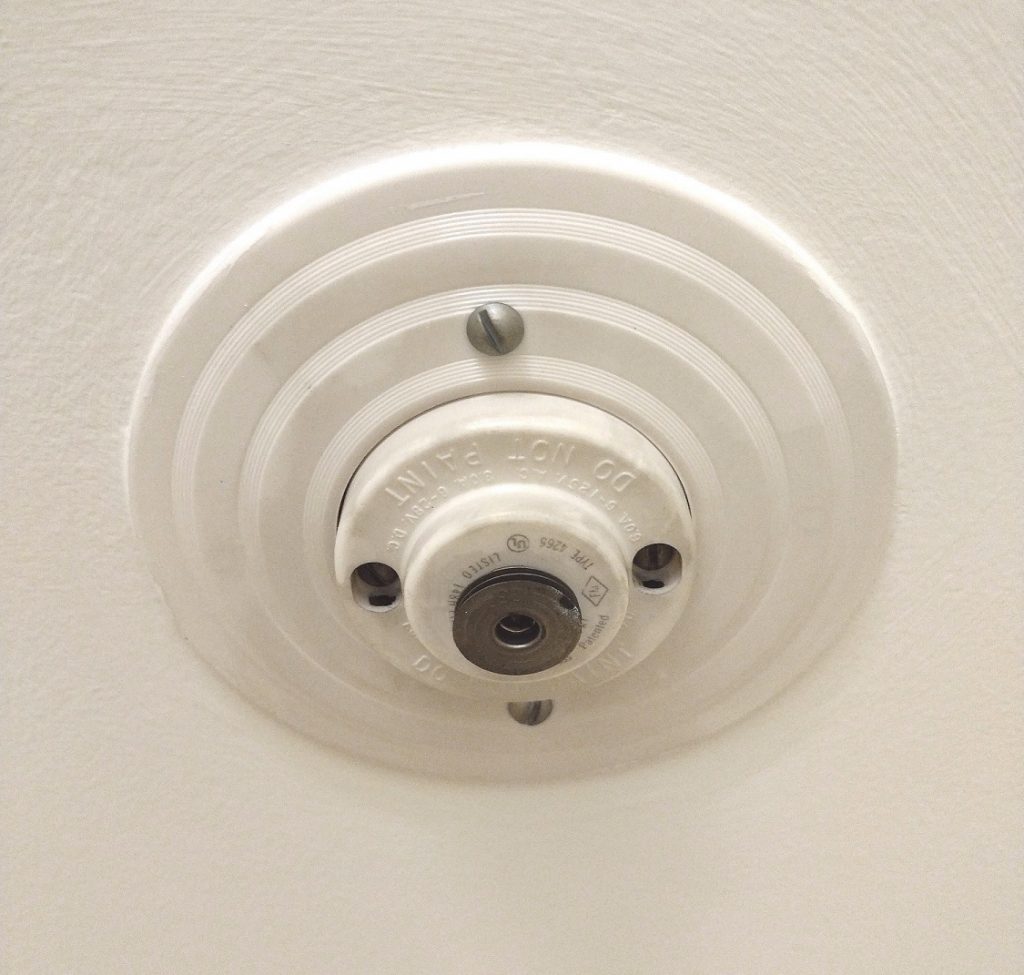
Synthex model 4265
If tripped, the device would be stuck in alarm until we could get up on the lift to replace the disc. Since this portion of the system was conventional, the entire zone would have to be disabled in that scenario. Technicians should familiarize themselves with all of the types of mechanical heat detectors.
You rang?
We like to joke around here.